Home » Fitli » Fitli Product Update – November/December 2022

The holiday season is a busy time all on its own but we’ve definitely been extra busy here at Fitli. While our efforts were primarily focused on getting prepared to switch to the new payment processor, we also managed to work out a couple of kinks and add some new features that will hopefully improve your experience. Consider it our gift to you. 🎁

Feature Updates

Display or Hide your Professionals Profiles

Clone a Package

Customer List Updates

Request Account Deletion

View Repeat No-show Customers

Bookings Report by Service

Sales Report by Customer

Let’s look at them in detail.

Display or Hide Professional Profiles

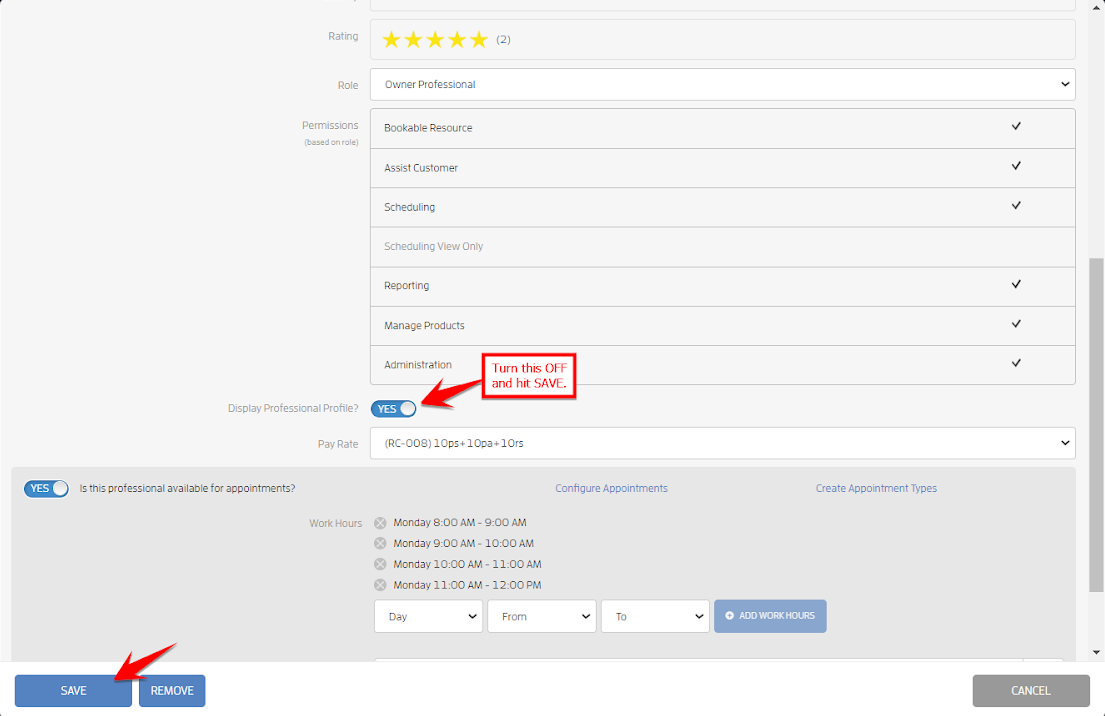
Professional profiles can be a good tool to allow customers to get to know your instructors better. However, depending on your setup, it may not always make sense to display a professional profile. Now, you will be able to choose to hide the professional profile depending on the Service or the User

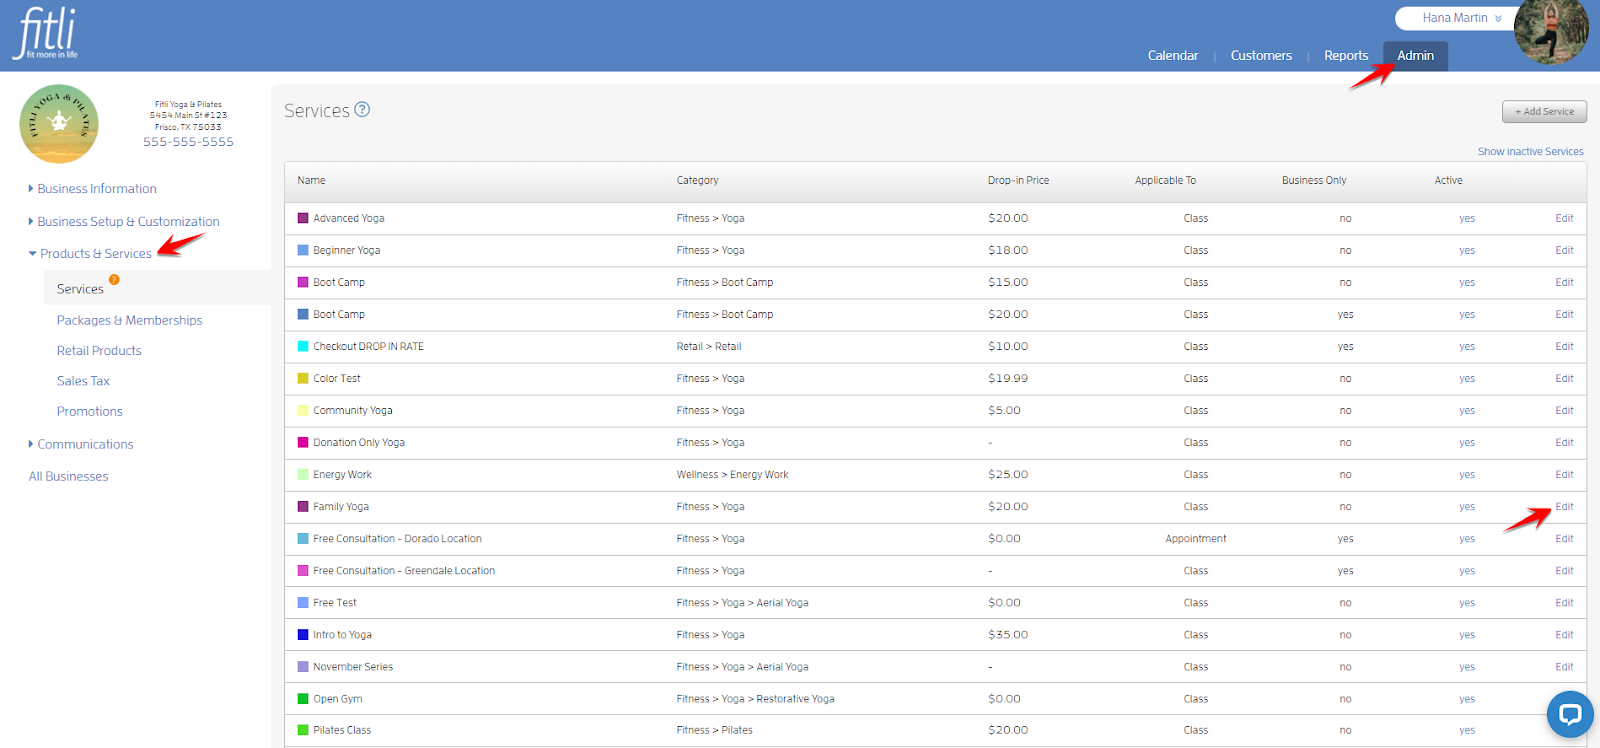
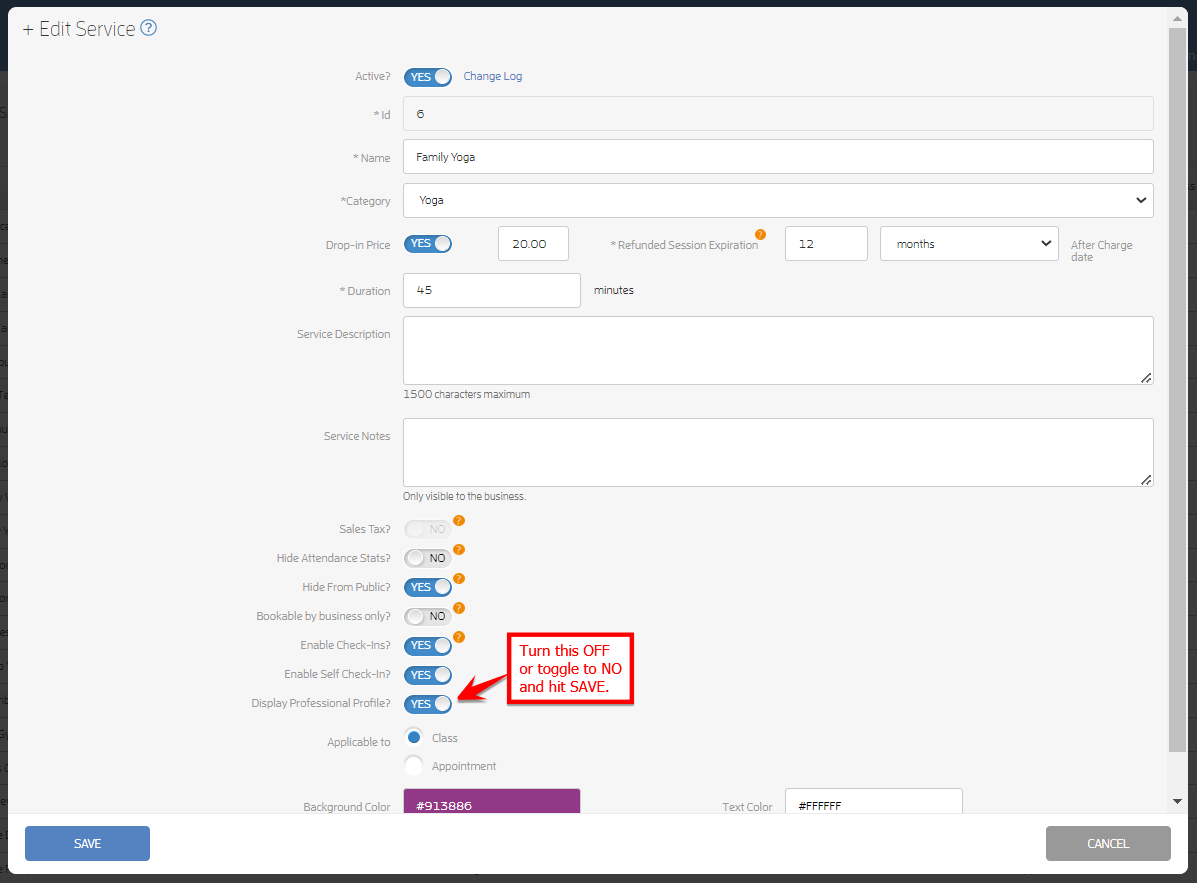
To hide all instructor profiles for a particular service, go to Edit. On the Edit Service pop-up, turn off the ‘Display Professional Profile?’ toggle and hit save.

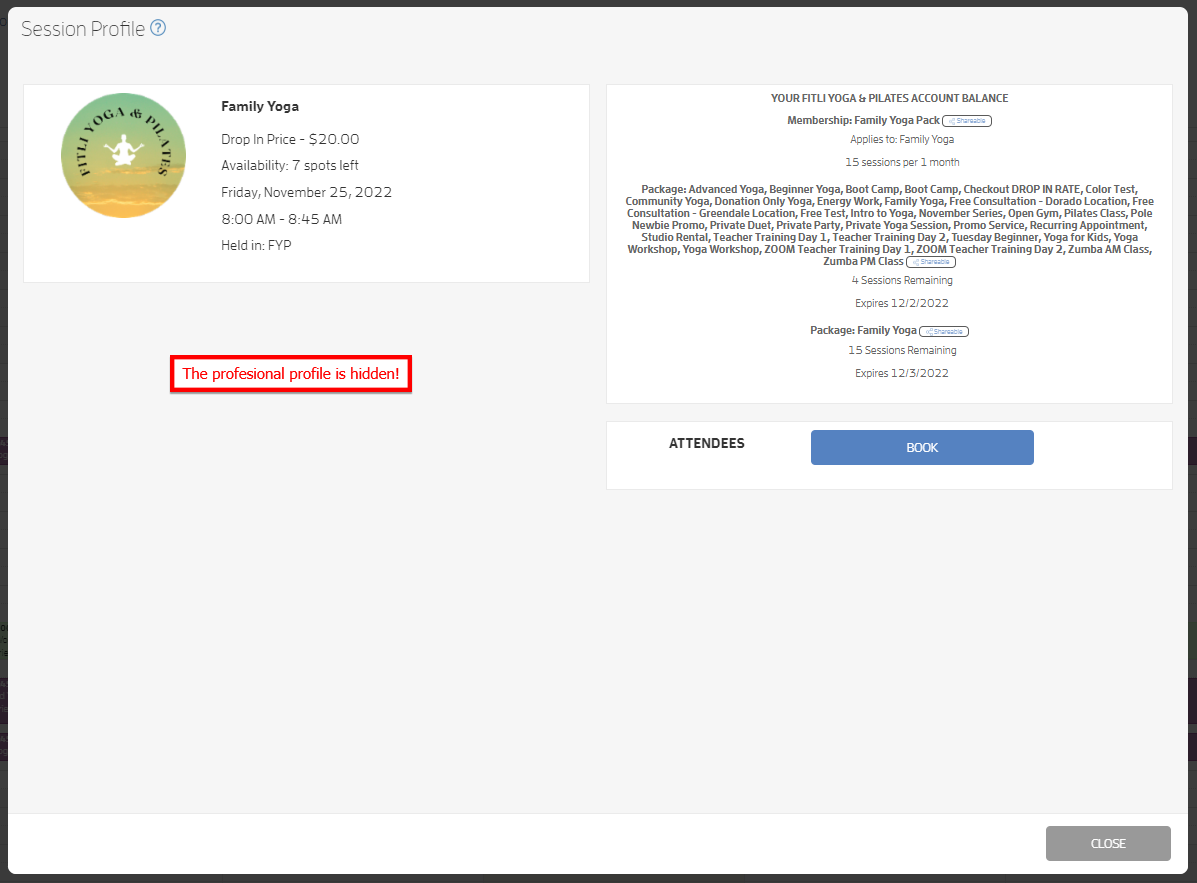
This will hide all your instructor profiles from that particular service. However, all the other sessions will still show your instructors’ profiles unless you choose to hide them.

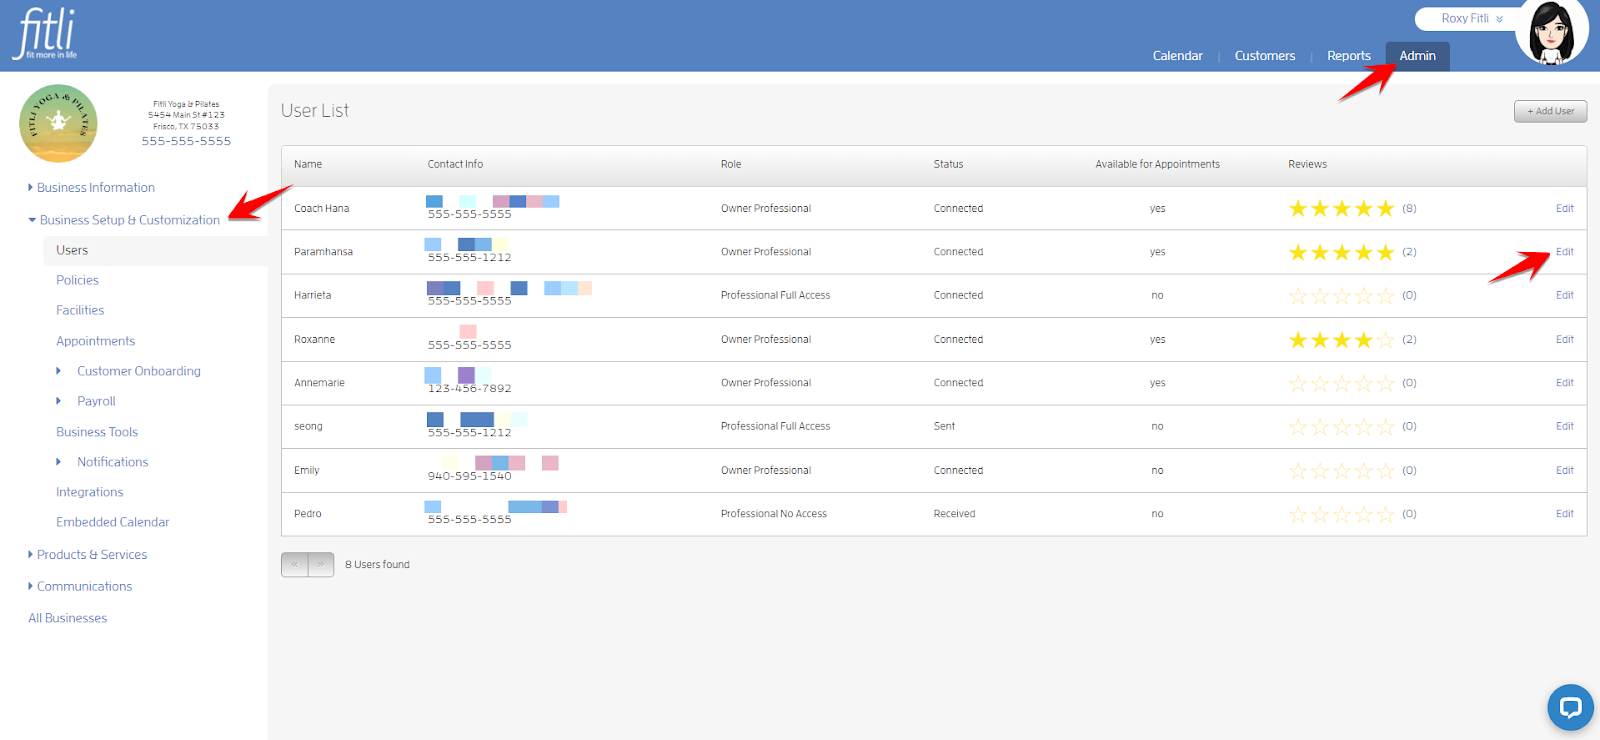
In case you want to hide one particular instructor’s profile from the classes that they are set to instruct, go to the Users Section and click the Edit button next to that instructor’s profile. On the pop-up window that opens, turn off the ‘Display Professional Profile?’ toggle and hit save.

Clone a Package

Want to update pricing on a package or membership or create a new, slightly tweaked version of an old package? Now, you don’t have to go through the hassle of creating one from scratch because you can simply clone an existing package.

To clone an active package, go to the Admin section and click Products & Services from the left-side menu. Click the Edit button next to the package you want to clone.

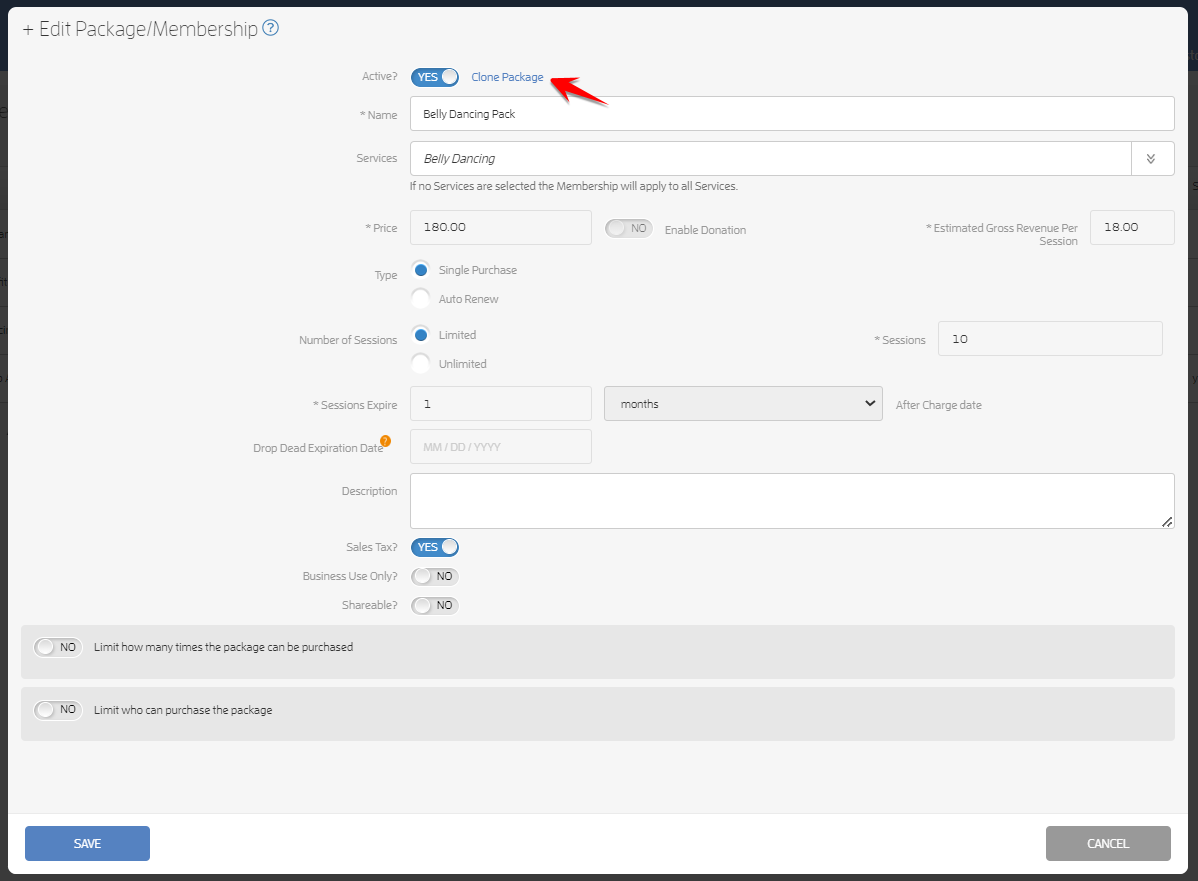
On the ‘+ Edit Package/Membership’ modal, click the Clone Package link at the top.

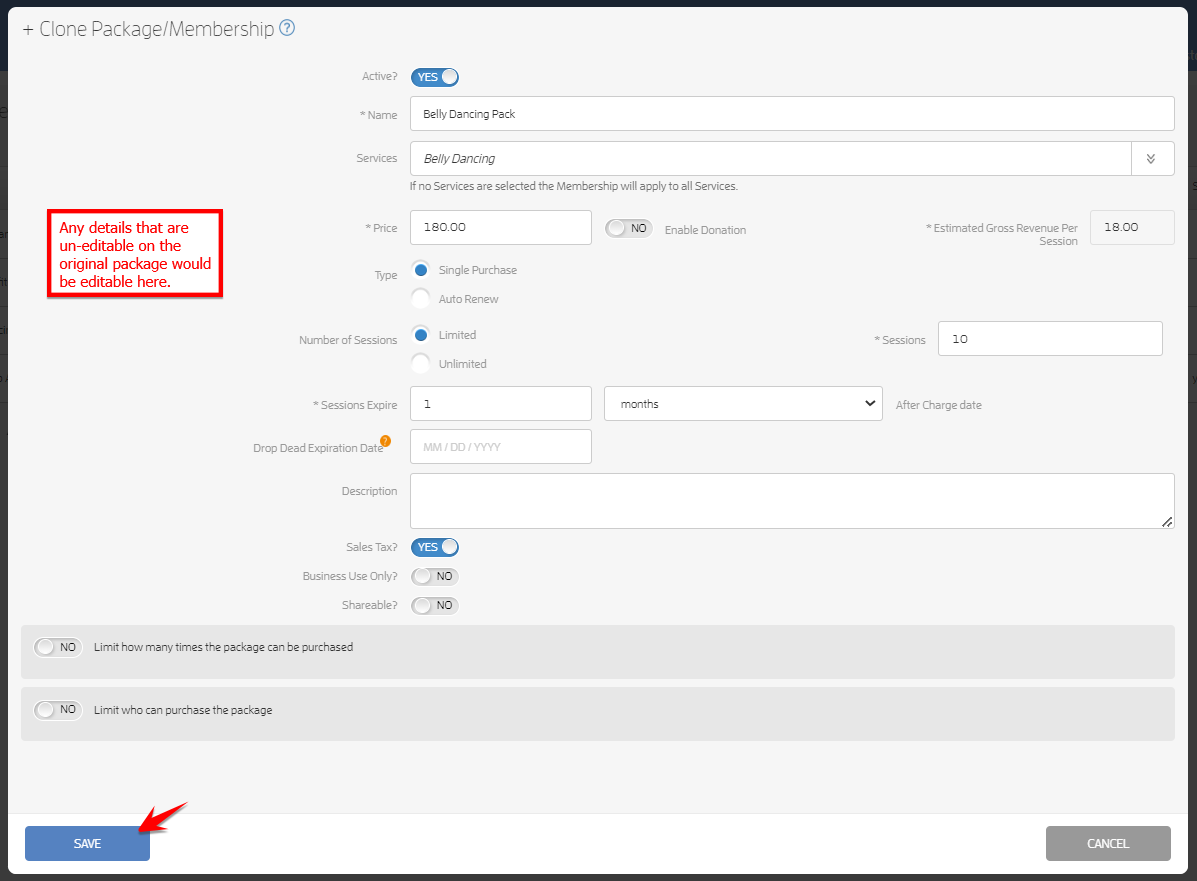
You’ll be directed to the + Clone Package/Membership modal. From here, you can edit the package’s details including the pricing. Make sure you edit the details and mark your preferences before the package is purchased. You can always clone a package, click Save and edit it later but only as long as it remains unpurchased. Once it’s purchased, you won’t be able to edit certain details.

Note: Any details that were un-editable on the original package would be editable on the cloned package. All details of the old package will be copied to the cloned package including its limitations if any. Your original package will remain unchanged and associated with customers’ accounts as long as the membership has not been canceled.

Expired packages can also be cloned the same way. Unsure about any of these steps? Here’s an in-depth guide to cloning a package.

Customer List Updates

  • Total number of Active Customers on the exported Customers list file

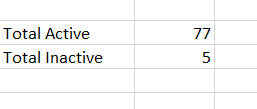
This may seem like a small thing but the total number of your Active and Inactive customers will now display on your exported report. It not only gives you an accurate count but could also provide a rough insight into your customer retention. 

This could also help you determine if you should consider reaching out or providing special offers to get inactive customers back in the door and re-engaged with your services.

Your customer count will show up on the exported CSV file at the bottom of column A.

  • Hide the Customer List Export Button for Anyone without Reporting Access

Your instructors and other staff likely have access to your Fitli account but you might not want everyone to export your customer list.

To give you that added security, we’ve now made sure that any users on your account without the reporting access are not able to export your customer list. The ‘Export to CSV’ button will be unavailable to all non-authorized users. 

Request Account Deletion in iOS App and Web

As much as we’d hate for any customer to leave us, we understand that they can have different reasons to do exactly that. If for some reason, a customer wants to completely delete their personal account and remove their information, they can request account deletion with just a few steps.

  • Account deletion on the web app

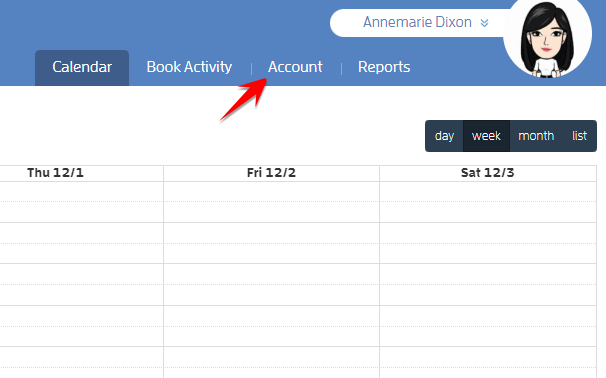
To request account deletion on the web app, the customer can simply log into their account and click the ‘ACCOUNT’ tab at the top menu.

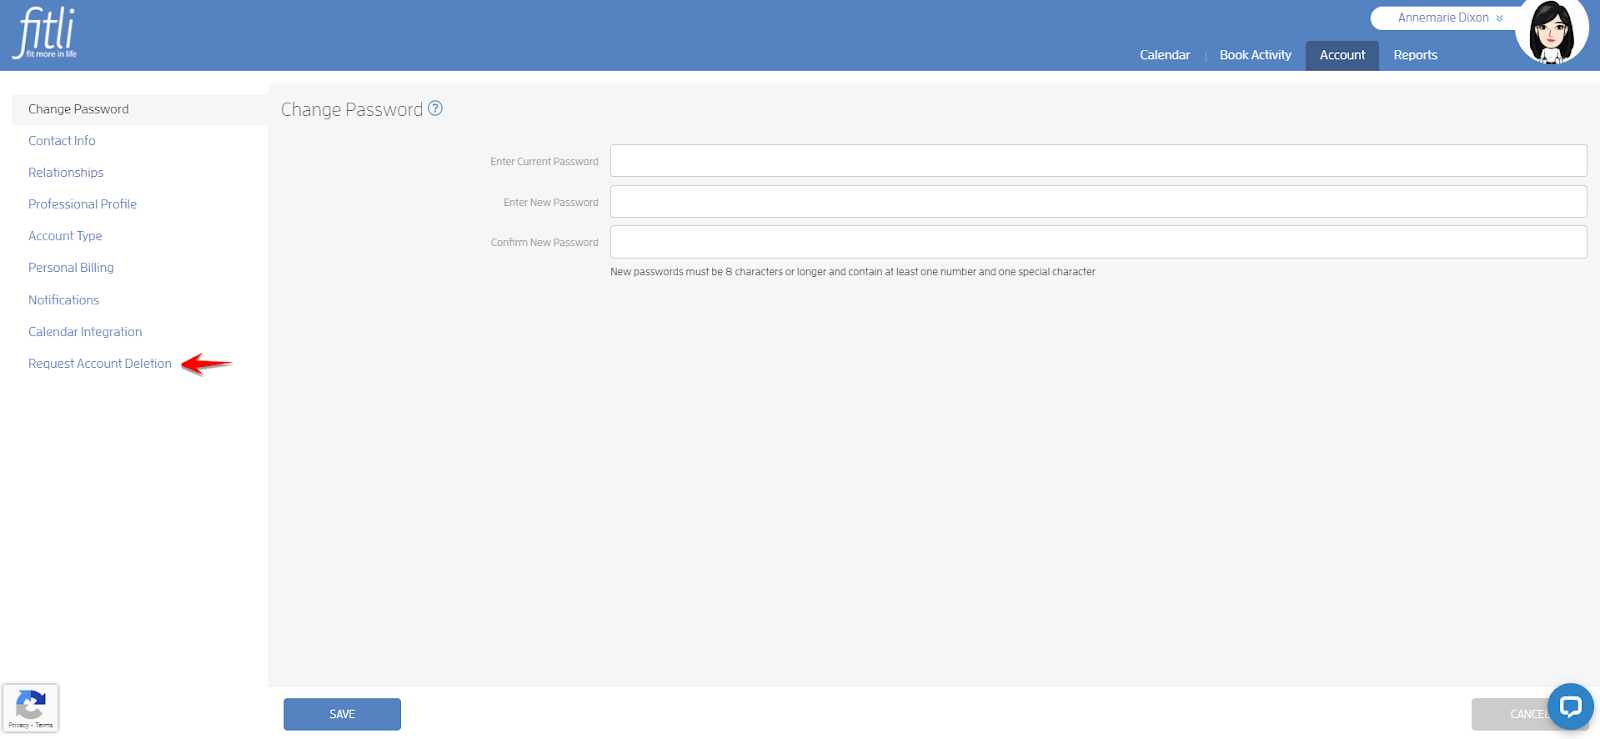
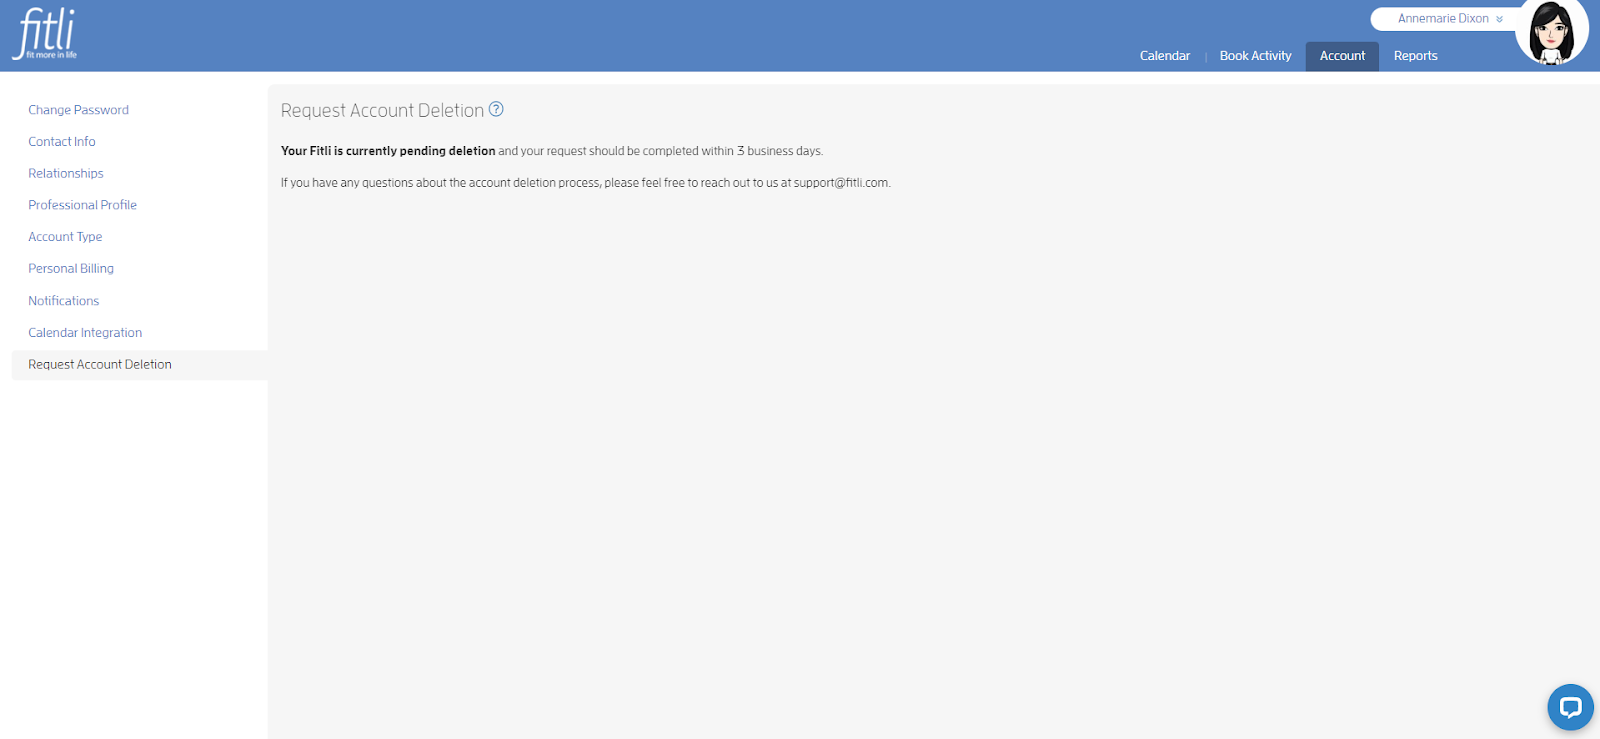
They would then click ‘Request Account Deletion’ on the left side menu.

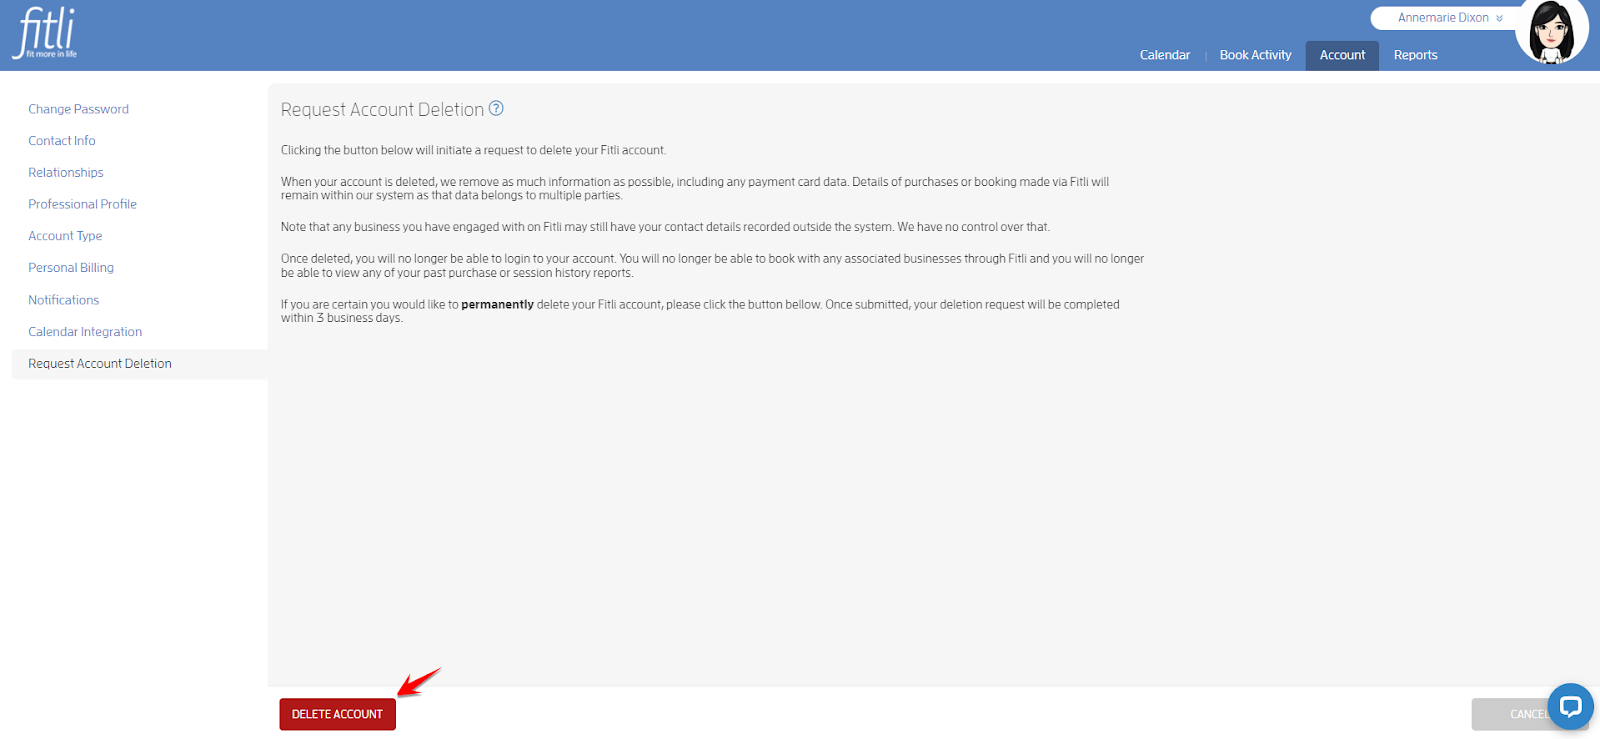
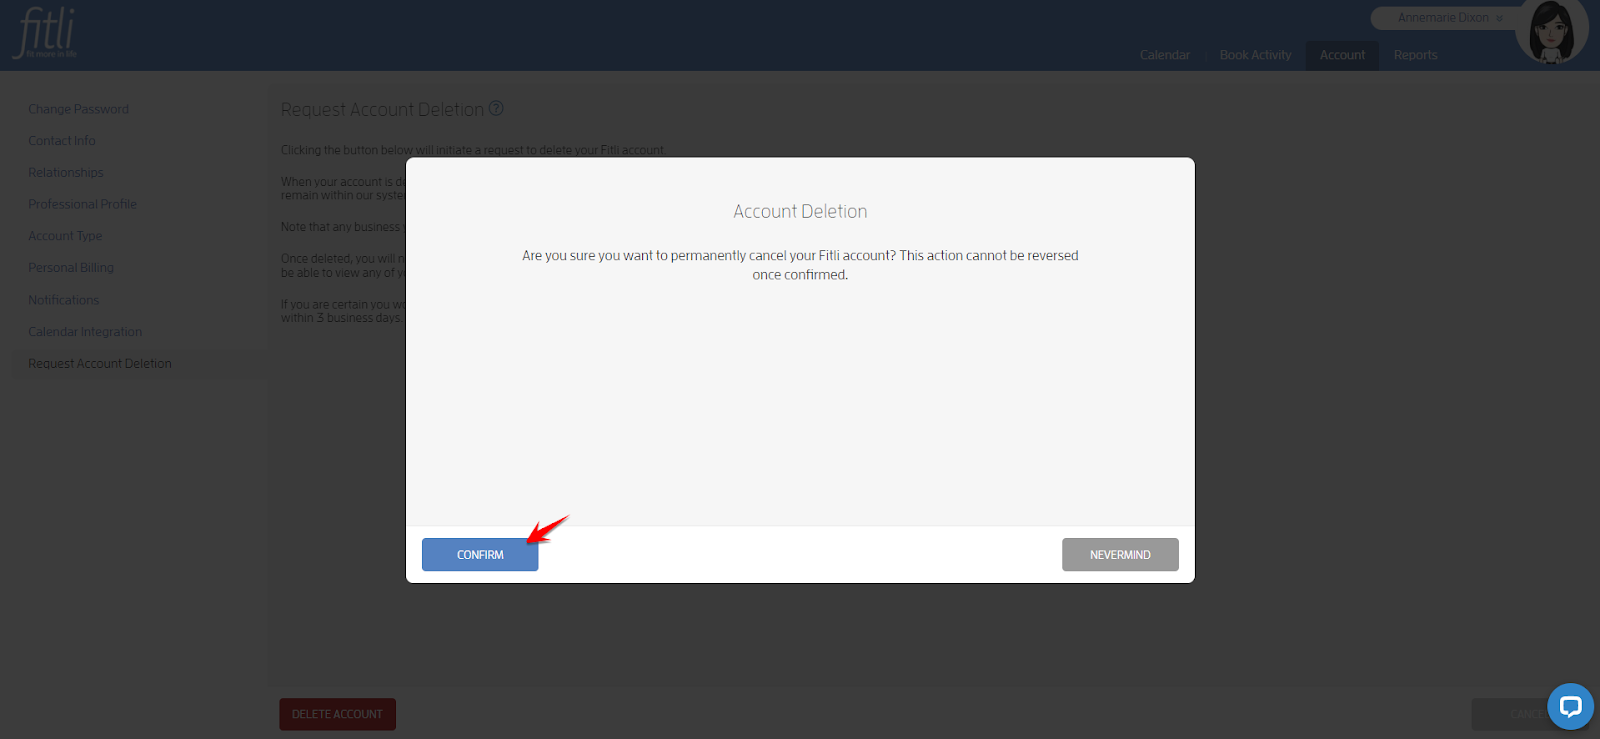
They will be directed to a new window explaining everything that happens when they permanently delete their account. If they want to continue, they should click ‘DELETE ACCOUNT’ and ‘CONFIRM.’

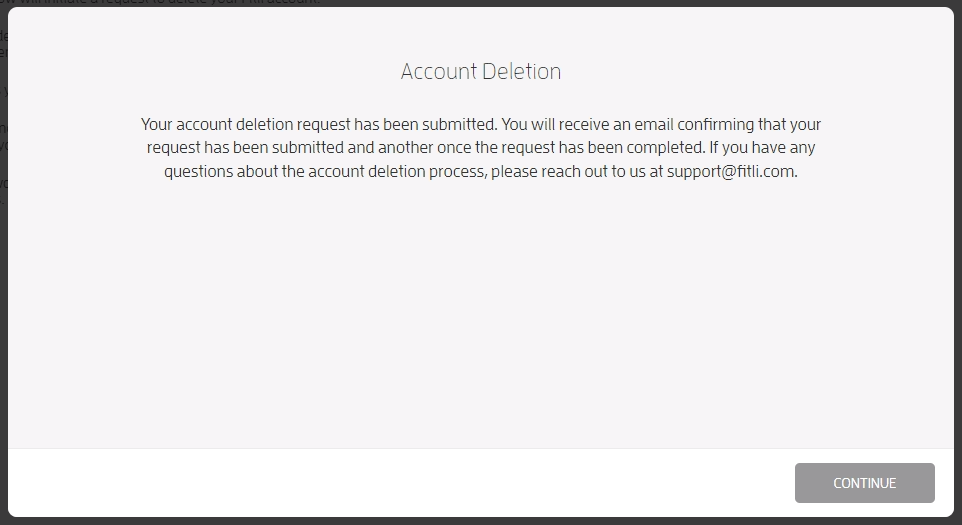
A confirmation message that the request has been submitted will pop up. 

The customer will receive an email confirming that their request has been submitted and another email once it has been completed.

  • Account deletion in iOS App

Customers can follow a similar method to request deletion in iOS App. Here’s a complete guide

View Repeat No-show Customers at a Glance

As a fitness business, you may want to know which customers are repeatedly no-showing to sessions. We have not previously offered an option to provide a quick view of customers that aren’t making it to the classes that they book but we do now!

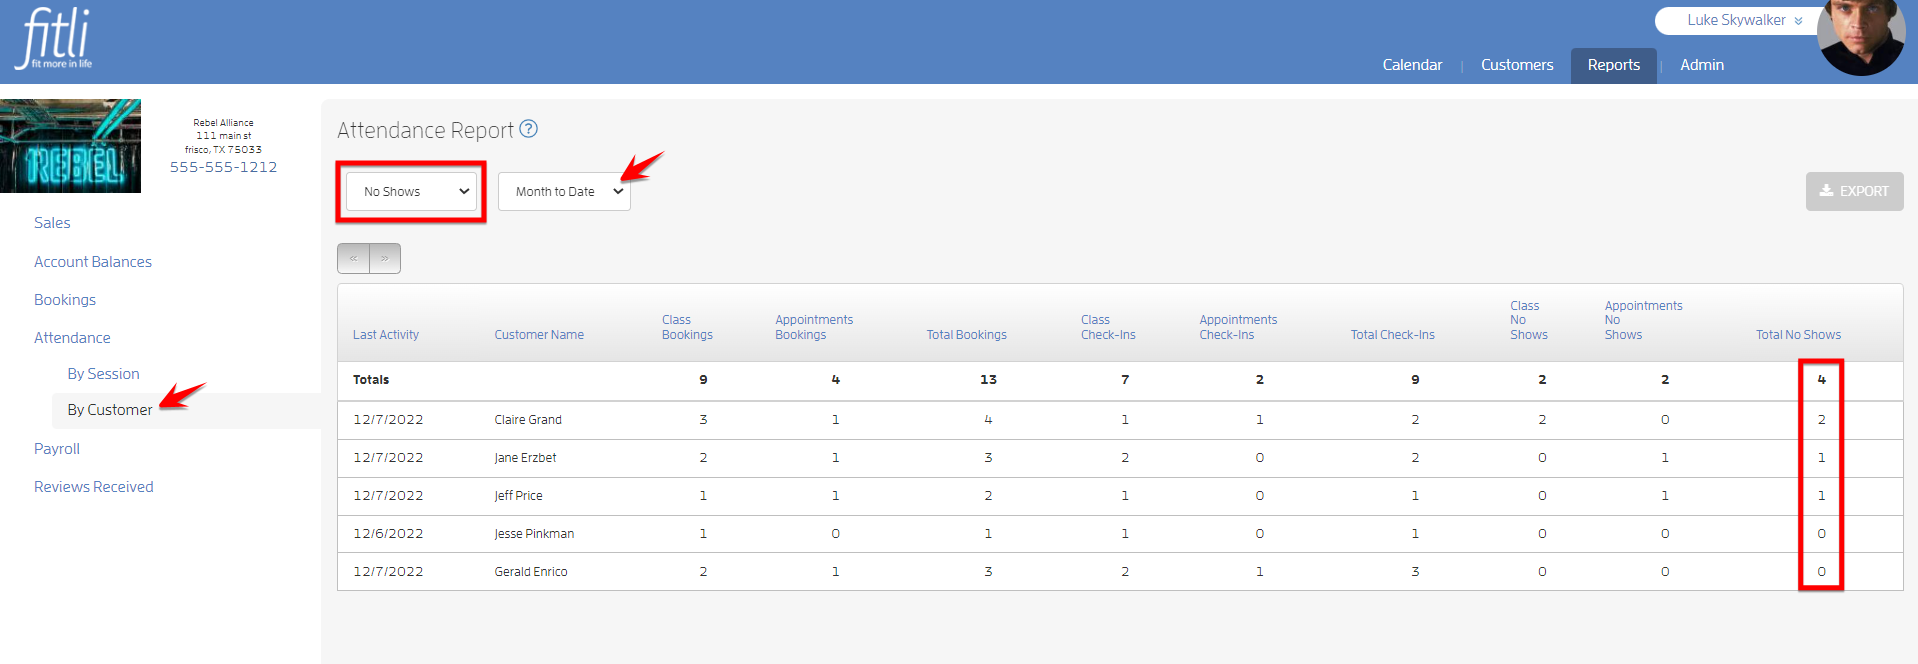
Now, your Attendance Report is now split into two versions: Session Attendance Report & Customer Attendance Report.

When you go to Attendance By Customer with the ‘No Shows’ view, it will display customers in descending order of Total No Shows. You can also export this report in CSV like any other report.

Bookings Report by Service

It’s good to know how much revenue your business is generating overall but sometimes you may also find it necessary to know how much revenue your individual services are bringing in over a given period. Additionally, you may want to know how popular the service is over a period of time in terms of bookings and/or check-ins. 

Knowing this information helps to ascertain how well your service is performing compared to others you offer and help you determine if you need to take additional measures to make it more valuable to your customers and increase profitability. We’ve now added a Bookings by Service Report for you to access this information readily. 

To view this report, go to your ‘Reports’ tab. Under the ‘Bookings’ section, you will find the Bookings by Service report showing the total revenue as well as the total number of bookings, check-ins, and no-shows for the service over the date range selected.

Sales Report by Customer

We’re also adding a Sales Report by Customer, so you can determine how much revenue particular customers are generating. This will help to identify VIP customers and can be a crucial tool in building or maintaining customer loyalty programs.  

You will find the Sales Report by Customer in your ‘Reports’ tab. The report will show you the Total Gross Sales and Total Net Sales of each customer for any selected date range.

You can also filter by customers with sales activity (those with a non-zero amount under Total Sales for the selected date range) as well as by customers with no sales activity (those who have $0.00 in Total Sales for the selected date range). This will help you identify inactive customers should you want to clean up your customer list. 

We hope that you’re as excited about the new changes as we are and more importantly, we hope that it makes your experience of the platform that much more convenient. We’ll be here working hard to keep bringing you new functionality that helps you run your business better.